Replacing An A'van Roof Hinge
Recently however, when putting up or pulling down the roof, a creaking noise emanated from the vicinity of the front roof hinge. Inspection of the blind (pop) rivets fixing the hinge to the roof indicated that many of them were pulling loose.
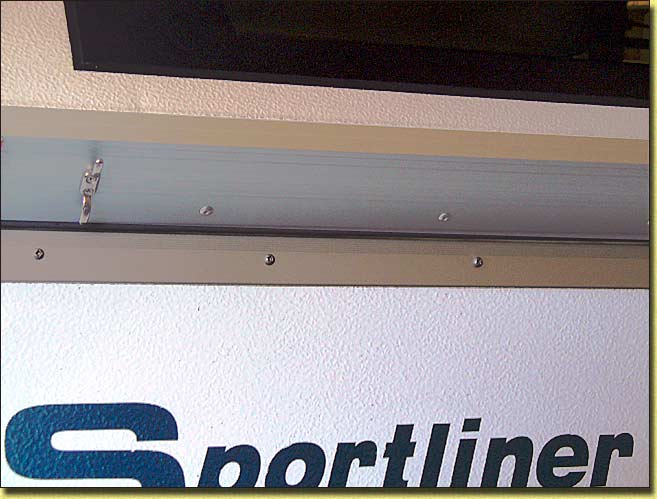
Blind (pop) rivets which have to be removed along roof extrusion (top row)
The first job therefore was to replace these rivets with 6 mm diameter bolts (12 mm long) from the outside each having a 6 mm "nylock" nut on the inside. The portion of the rivet pin which remains in the rivet after fixing was knocked out back into the A'van from the outside using a 2.5 mm pin punch . The rivet could then be drilled out using a 6 mm twist drill bit. As each one was drilled out it was replaced with the nut and bolt before drilling out the next one. This ensured the roof remained securely held to the A'van body as each rivet was replaced.
The roof was then raised and lowered. The creaking appeared louder than ever which confirmed my suspicion that the hinge itself had "frozen" in the one position. Whilst it was still possible to open and close the roof, the hinge "leaves" were just flexing rather than turning on the hinge pin as intended. The hinge had to be removed from the A'van and if possible loosened up or be replaced with a new one.
It was reasoned that once all of the 15 bolts which replaced the rivets were removed, the roof would not be adequately supported and under the influence of the powerful corner springs, could well come completely adrift... not a desirable situation! To provide what was hoped to be adequate support, the two rooves were clamped together at the apex using the existing pins(see "Increased Roof Wind Security" modification). (Otherwise "G" clamps and pieces of plywood packing could be used at the roof apex on each side if this modification had not been undertaken) Additionally, a vertical timber support was clamped to each side of the roof as can be seen in the following photograph:
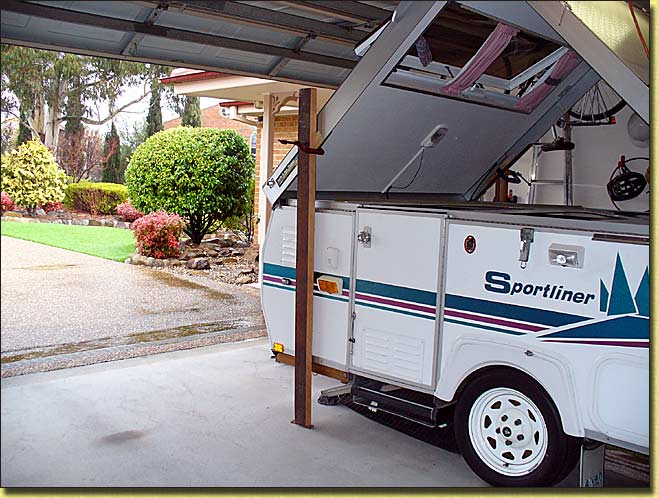
Vertical timber supports (2) clamped in position before removing the hinge bolts
When the 15 bolts were removed, the roof moved forward about 50 mm and 10 mm up. Otherwise it felt quite stable and I'd worry about how I could pull it back after fixing the hinge or fitting a new one.
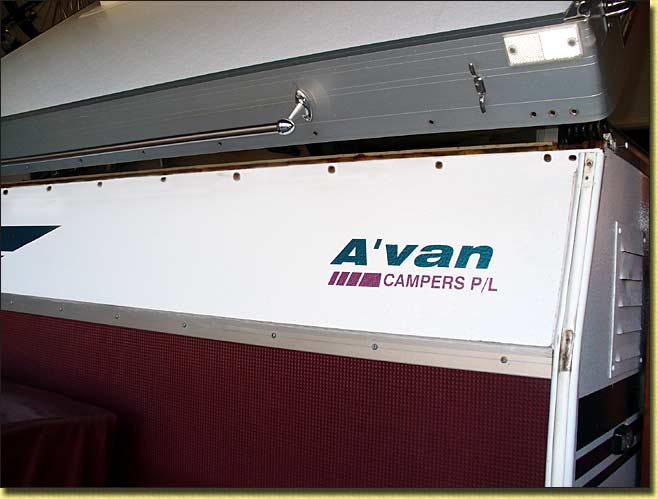
It was hoped that the screws holding the outside horizontal aluminium strip below the hinge (see top photograph) also secured the hinge to the A'van body... but no such luck! The screws were removed but the hinge felt as firmly secured as before. To remove the aluminium strip itself the handle on either side of the A'van had to be removed first ( prise off the plastic covers top and bottom of each handle and remove the exposed screws). The aluminium strip could then be removed by springing it out sufficiently in the middle for one end to be pulled clear of the vertical corner moulding. The hinge was still as secure as before . Further investigation indicate there were other screws through the hinge which must have been put in place before the front outer skin was fitted. Fortunately, by probing with a fine scriber from above, it was possible to feel the heads of all those screws and then mark their location on the outer skin. As the screw heads were all behind where the aluminium strip is normally located, a series of holes (diameter at least the head diameter of the screws) were drilled through the skin, thus enabling a screw driver to remove all the screws. Bingo... the hinge could then be lifted clear.
Front skin, showing clearance holes for removal of hinge screws located behind the skin
Inspection of the hinge confirmed it was seized solid. Soaking it in WD-40 followed by gentle persuasion in a vise and with grip wrenches did free it up somewhat. Parts of the hinge had rusted through which I silver soldered back into position. However it seemed false economy to persevere as it would probably soon seize up again. A phone call to the nearest friendly A'van dealer Spare Parts Department, enquiring as to the availability of a hinge was not very encouraging. "No, we do not have one in stock". "Could you get one in for me?" "Yes, we could do that". "How long would that take?" "Oh, they do come good... eventually." This confirmed what many A'van owners had previously told to me... "Best of luck, hope you have infinite patience!". Then, the gods smiled on me... "Try the Workshop, they may have one there". The workshop could not have been more helpful... "No, I don't have one here at the moment, but can order an appropriate sized blank hinge from a specialist hinge supplier and it will be here in a couple of days. You will need to cut it down to the same length, and drill through all the holes from the old one." Two days later I had my new hinge which has a brass internal hinge rod, unlike the original which was steel.
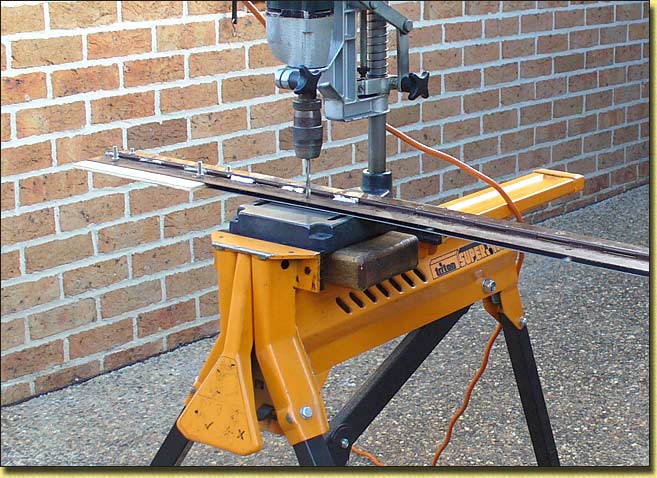
Using the old hinge to locate and drill holes in new hinge. Note plywood packing pieces between hinges
The new hinge was cut to the same length as the old one and all the holes transferred as shown in the photograph above. There were three different size holes. The new hinge was then positioned against the A'van body and secured with all the screws used on the old one. The aluminium strip and handles were replaced and the holes near the top corners of the handles resealed with silicone sealer.
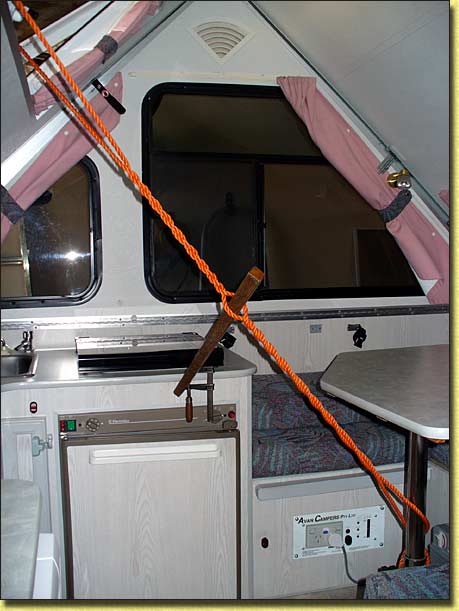
All that remained was to position the roof to enable the top row of bolts to secure the roof to the A'van body via the hinge. Again, the gods smiled on me. I often use a looped rope and twisting stick to reposition awkward or heavy items. If the rope is long enough, one end is tied to the item to be moved, then tied to some convenient immoveable object before looping back to the item to be moved. If the rope isn't long enough, use two ropes. In this case our A'van front roof has a full width opening window and the table is fixed to the floor (plus to the chassis in an endeavour to make it more rigid... a previous modification). One end of the rope was tied to the front towel rail support, with the remainder of the rope passing through the open window, around the table leg, back through the window and tied to the other support of the towel rail. The towel rail support fixings appeared adequate for the amount of pull I expected the rope to exert on them. A timber stick placed between the ropes inside the A'van, when twisted, provides controlled tightening and the roof gradually pulled into position so I could easily replace and tighten all 15 bolts and nylock nuts. If there isn't an opening window and/or a fixed table, some other means of pulling in the roof will have to be devised... but you get the idea.
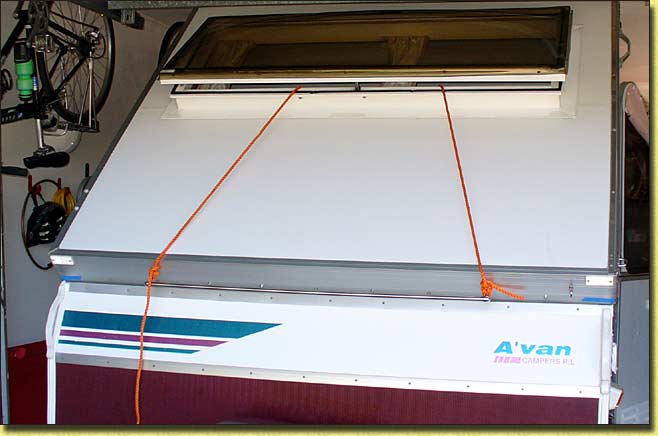
Ends of rope loop secured to towel rail supports
Rope through window looped around table leg and twisted to tighten.
Twist stick clamped to hotplate bench top while bolts replaced in hinge
Our A'van roof now goes up and pulls down without any creaks or groans, and hopefully will continue doing so for another 14 years!
The blank hinge supplied (known as a "continuous hinge" or a "piano hinge") for the roof of our 1999 Sportliner was a close match to the original roof hinge i.e. 2.18 metres long by 76 mm open width, 1.5 mm thick (steel), 4 mm diameter hinge pin (brass). I had to cut off a 183 mm length to match the original.
I see that A van Camper Spares list a 1,978 mm long camper roof hinge which is about the right length but I don t know if it would be already drilled or directly interchangeable with the ones fitted to a 1999 Sportliner. They could well have made some changes since our A van was built.
Keith Thomas
E-mail: emrysthomas2024@gmail.com
Website URL "actavanning.org/index.html"